
Table of Contents
Ever look at a picture on your laptop and think:
“What is that?”
“Where can I buy that?”
“What does that text say?”
Good news.
Learning how to use Google Lens on laptop is easy. You don’t need special software. You just need the right browser.
Let’s break it down in simple steps anyone can follow.
🔍 What Is Google Lens?
Google Lens is a tool made by Google.
Instead of typing words, you search using images.
Google Lens can:
- Identify objects
- Copy text from images
- Translate languages
- Find similar products
- Recognize landmarks
It’s like giving your laptop smart vision.
💻 How to Use Google Lens on Laptop (Best Method)
The easiest way is through Google Chrome.
If you don’t use Chrome, download it first. Google Lens works best there.
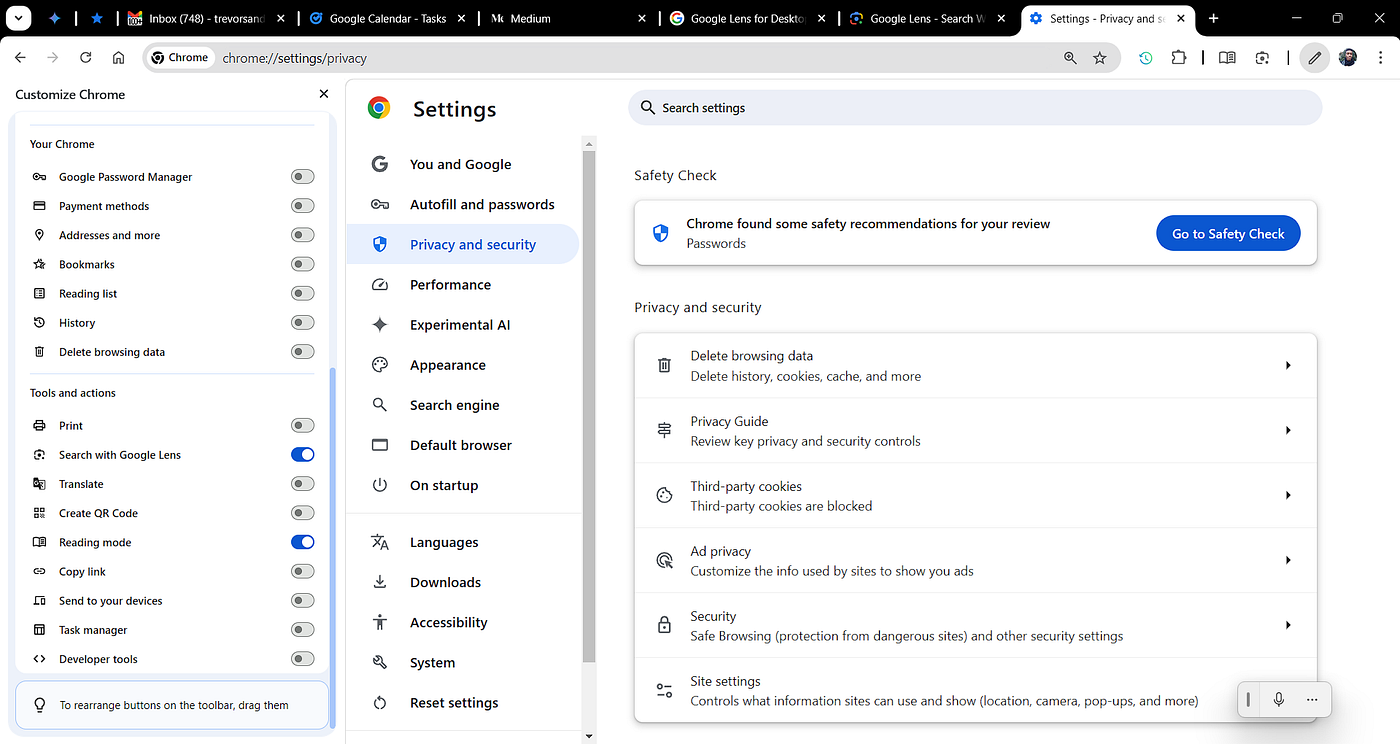
🖱 Step 1: Right-Click an Image
- Open Chrome.
- Visit any website with an image.
- Right-click the image.
- Select “Search image with Google Lens.”
A panel opens on the right side of your screen.
You’ll see:
- Similar images
- Shopping results
- Related websites
- Source information
That’s it. Super simple.
✂️ Step 2: Search Only Part of an Image
Sometimes you only care about one object.
After opening Google Lens:
- Drag the selection box.
- Highlight just the object you want.
Example:
- Only the shoes someone is wearing.
- Just a chair in a room.
- A logo on a product.
Google Lens will focus only on that section.
📝 Step 3: Copy Text From an Image
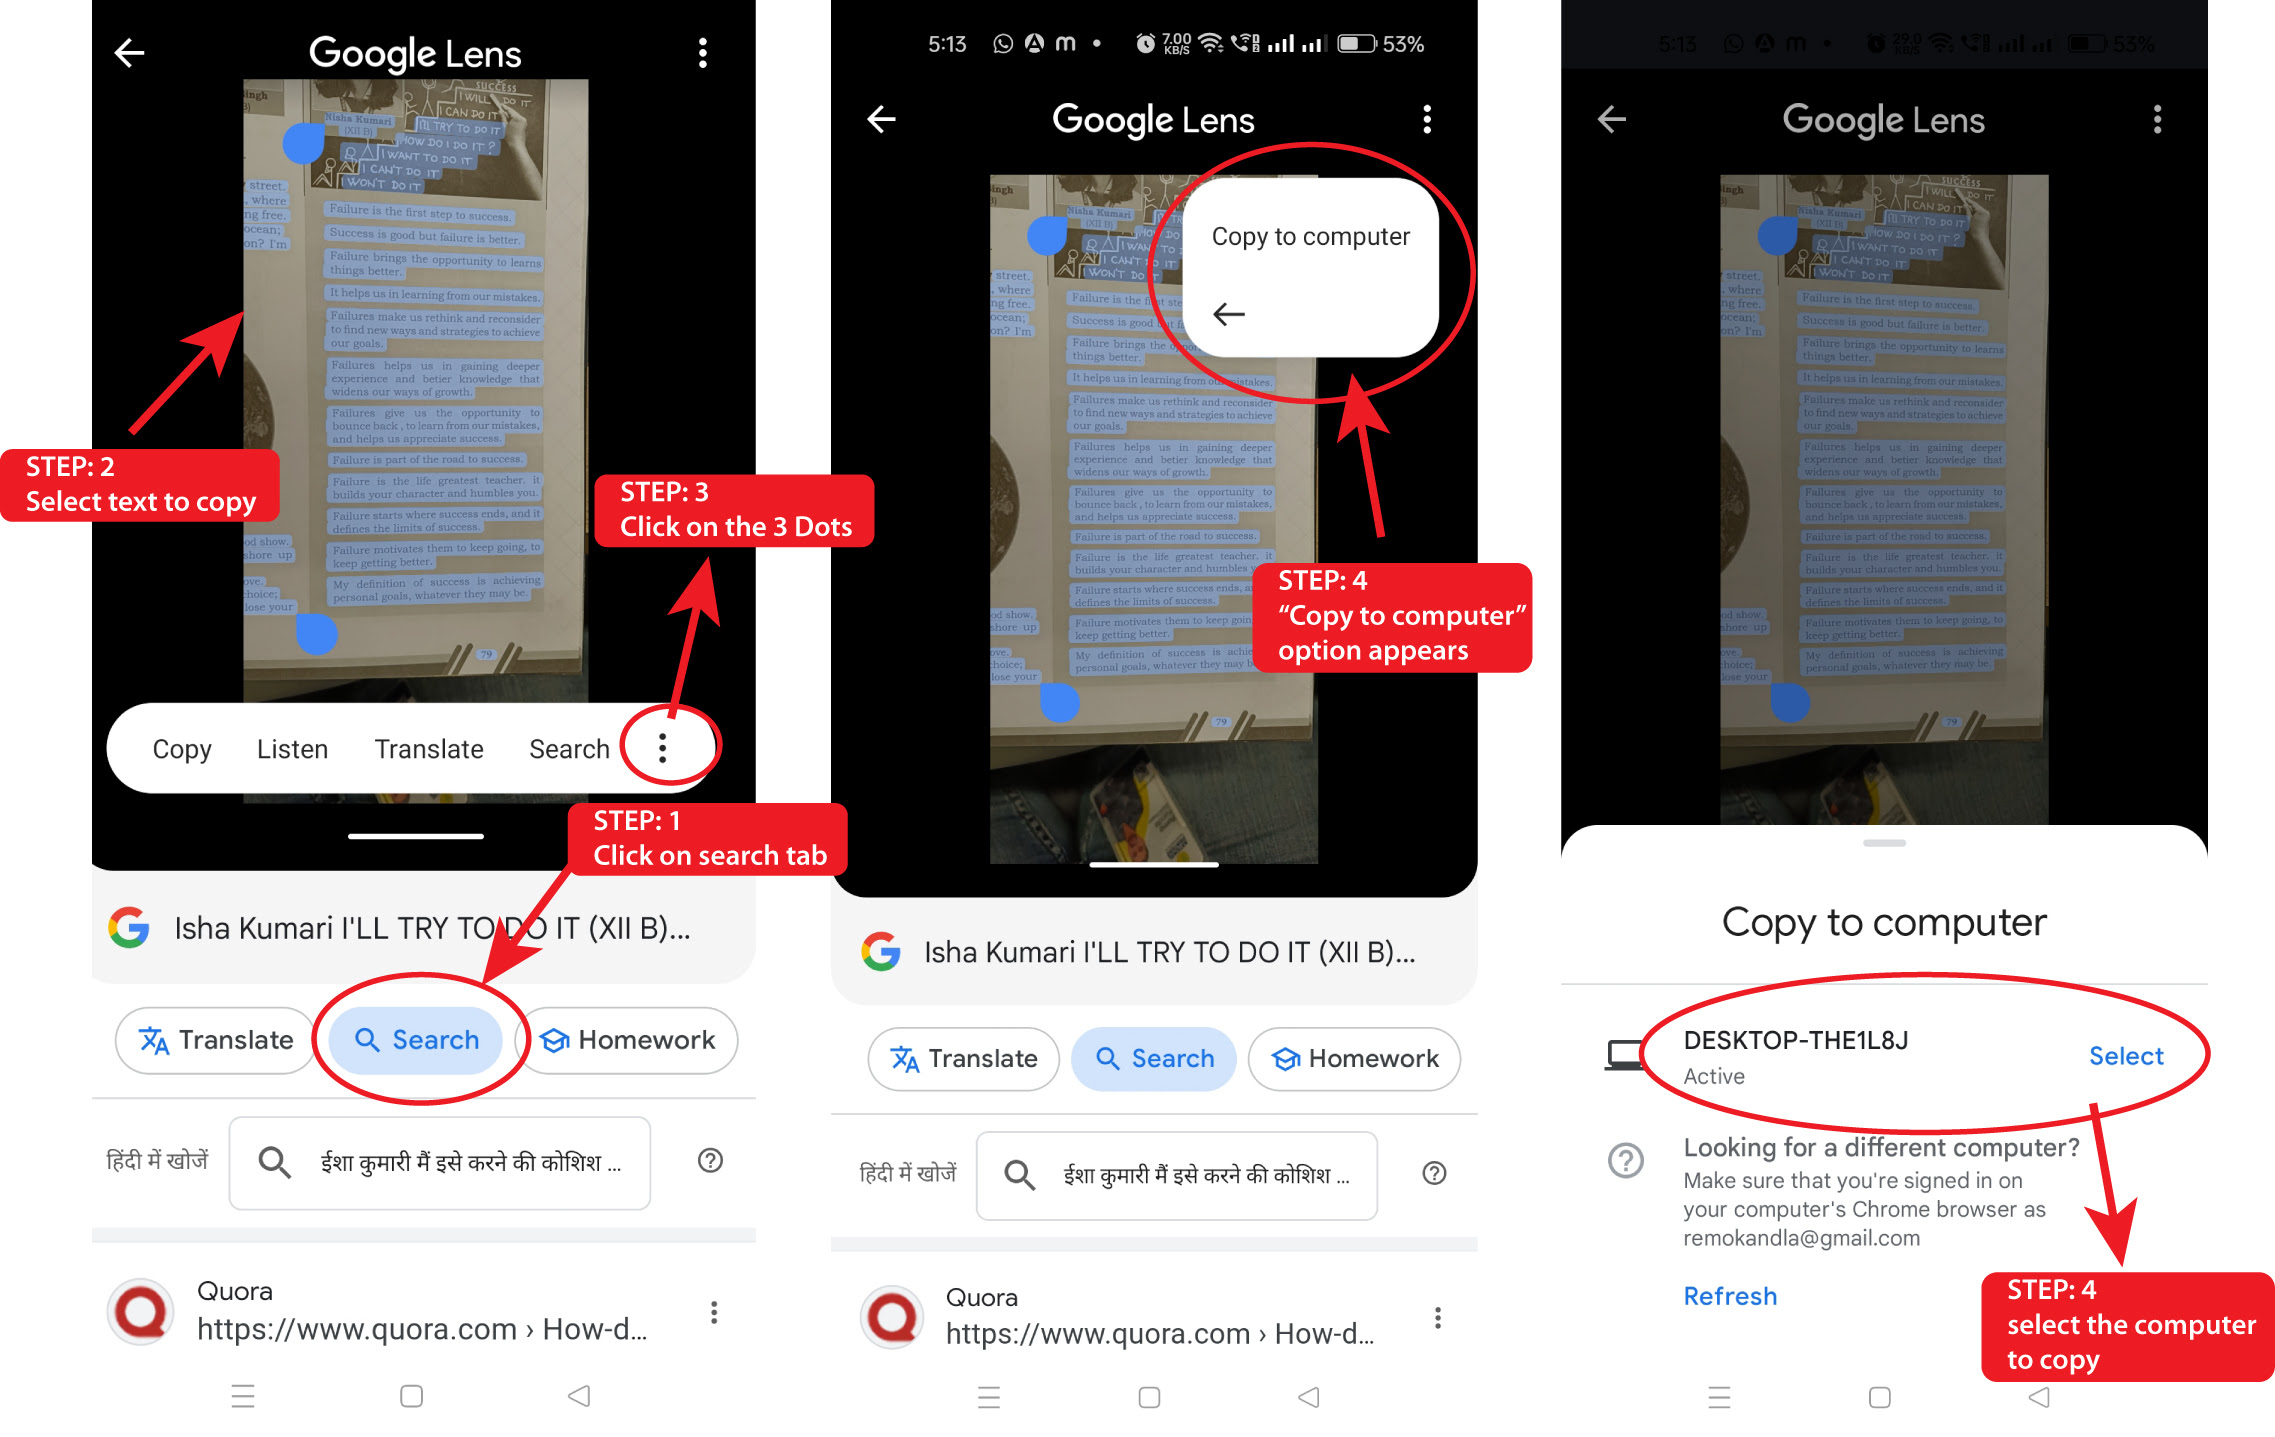
This feature saves time.
If the image has text:
- Open Google Lens.
- Click the Text option.
- Highlight the words.
- Click Copy text.
Now paste it anywhere.
No typing required.
Great for:
- Phone numbers
- Notes
- Addresses
- Quotes
🌎 Step 4: Translate Text
See text in another language?
- Open Google Lens.
- Click Translate.
- Choose your language.
The text changes instantly.
This works well for:
- Foreign websites
- Travel information
- Product labels
📤 How to Use Google Lens on Laptop With Your Own Images
You can also upload images manually.
- Go to Google.com.
- Click the camera icon in the search bar.
- Upload an image from your laptop.
- Let Google Lens scan it.
This is perfect for saved photos or screenshots.
🚀 Why Use Google Lens on Laptop?
Using Google Lens on laptop helps you:
- Shop smarter
- Research faster
- Copy text quickly
- Discover similar images
- Get instant answers
It makes browsing faster and easier.
Once you try it, you’ll use it often.
⚠️ Common Problems and Fixes
Don’t See Google Lens?
Update Chrome.
It’s Not Accurate?
Try selecting a smaller part of the image.
No Right-Click Option?
Make sure you’re using Chrome.
Most problems are simple to fix.
❓ Frequently Asked Questions
1. Is Google Lens free?
Yes, it’s completely free.
2. Does it work in all browsers?
It works best in Google Chrome.
3. Can I use it without signing in?
Yes, but signing in improves features.
4. Can it identify products?
Yes, it can show shopping results.
5. Does it work on saved images?
Yes, upload them through Google search.
6. Is Google Lens safe?
Yes, it follows Google security standards.
🎯 Final Thoughts
Learning how to use Google Lens on laptop is easy.
Right-click. Search. Discover.
That’s it.
No typing guesses. No wasted time.
Just smart visual search.
And honestly?
It makes your laptop browsing way more powerful.
Related Articles
Is Google Analytics Better Than SEMrush?
Technical SEO Audit Consultant Who Actually Fixes the Problem
Why Faster Page Loading Is More Important Than Ever
Latest Articles